Showing posts with label axle. Show all posts

Wednesday, May 9, 2012

AE86 Rear 4-link in the making~

After much waiting my Rod-end (rose joint, fish-eye-joint what ever you all called it :P ) was finally arrived yesterday~ It's POS 16 and POS 16-L, where L for left hand thread.
There's only 10 unit left in their stock and from the look of the boxes, they were fairy old~ I go for the copper lining type instead of the all time favorite PTFE lining model for it's sheer strength. For the same POS 16, copper lining can withstand higher dynamic load than PTFE lining POS 16.

*thanks to The Dog Project by Edgar's posted info which you can find here.

And finally i can start working on my rear 4-link. I'm using 2.5mm thick steel pipe aka c-Pipe for some local industry reason. Hope it's strong enough to hold onto the hard time i'm going to give it in the future.
 Cutting it to desire length and even out the end of the rod.
 Making the screw groove which the rod-end will be screw in later.
 Finish tap-ed rod.
And that's how it looks like before sending to get it's surface sink chromed to withstand malaysia's corrosive weather~ I make the rod 10mm shorter than standard which each side have 15mm of play means it can be adjusted 10mm shorter than standard 4-link or 20mm max longer than standard 4-link. To adjust the axle at optimum running angle with the props haft. 

I would have an extra set lying around for the time being. Who ever interested can give me a call. 

Cherrie-o~ 

Friday, January 13, 2012

Solid pinion spacer~ (AKA crush sleeves)

Last week, my friend Arthur bring one of his AE86's axle 3rd member to me. And asking if i could help him fix it or not. For he had read that i had a few experience with my car's LSD/axle. And his was in really bad conditions. At first glance, the pinion and ring gear still in work-able condition which leave me to check out the crush sleeve's pre-tension on the pinion bearings. And the result~~ I was correct. The pinion gear is sitting loose in it's housing. which means a faulty crush sleeve we were looking here. 
After taking apart the 3rd member. i compare the crush sleeve with my 'reference' unit which i made with a new crush sleeve and lock the pinion bearing until 60lb/f.
And Arthur's crush sleeve was 2.6mm shorter, yaiks~ 
After discuss with Arthur, he agree that he will let me made a guinea pig out of him bt making him a Solid pinion spacer. 
that 's what i had made by boreing out the sleeve from a single piece of mild steel. 
the standard crush sleeve is 1.65mm thick with a weaken ring to let it actually 'crush' when it's under tremendous pressure.
And the one i made for Arthur is 3mm thick and no weak point. Now it's cleaned, installed and send back for Arthur to install and tell me the result in his next Taman Selat Drift day~

So~ you may asking y went through all the hustle doing this??? 

This is the explanation i copy from a famous axle specialist in US call-ed Weir Performance.

"What these parts do when correctly installed is set the distance between the inner and outer pinion bearings (bearing preload). At the same time, these parts also locate the pinion gear relative to the ring gear within the casing. So, why does the crush sleeve fail? It fails because it is too weak to resist deflection when high pinion loads are applied. This is why we often hear people say, “my ring and pinion finally blew up”. The failure is not instantaneous as it would be if the gears were over-powered. The failure happens over time, due to repeated hard driving. High pinion loads deflect the pinion gear over and over until the o.e.m. crush sleeve becomes “loose” and cannot properly maintain the bearing preload. This also allows the position of the pinion gear within the casing to move causing misalignment of the ring and pinion gears. Over time, this leads to “howling” gears followed by “ground up” gear teeth and eventually destroys the gears. Protect your ring and pinion with one of our high strength steel solid pinion spacer kits."

Monday, January 9, 2012

AE86 rear Traction bracket~ Beta V1.0 trial production

Finally come back from KL. Really took some time off there and goes around to do some market survey. 

And while i'm away, the wider metal plate i ordered also had arrived. So, i took the material and the drawing and send it to my neighbor. 
And start milling out the desire piece to my bracket. 
 With their 5 horse power mean machine.
 That's carbite steel cutter he's using. slicing through the metal like tou-fu~ wow.
 received it after 5 hours of labour (>_<) that's 40bucks/hour. Do the maths.
 some slight alteration and on it goes. All the holes fit perfectly.
 And finally, it's welded together and a brief comparison with V0.09~ spot any different? 
 And give it a nice red coat to at least protect it from rust. 
All done and with *12.3 lb/in rated allen-key bolt with zinc coated nuts. It had 2 level setting which is 42mm offset and 64mm offsets.

I'll be making 10 sets in the first batch to test the respond. Any one interested can contact me via my contact link.

Saturday, December 24, 2011

AE86 rear Traction bracket prototyping~ V.09

When i was in KGC last week, some KE friends approached me and ask if i can made them something which catch-ed my interest. 
A traction bracket which installed under the axle where adjust the traction rod lower to point downward which will  help pushing the axle on the ground during acceleration. 

So after coming home and done some homework later~  i decided to made a prototype first to try on mango. And since i had a spare axle lying around. So i take it as my 'model' to fashion the brackets.
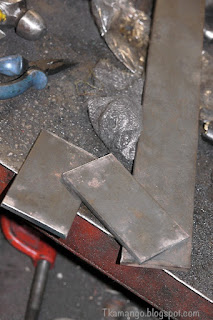
 After much consideration i decided to work it out from 6mm think of steel (which is the thickest metal i had in my factory) for it would take up a lot of stredd during hard cornering/drifting~
 Steps by steps measure out the holes on the axle and precisely drill the hole out to screw on to the axle.
final testing before weld them together with another piece of steel to add strength.  
Finally them become one~ i only use normal arc welding here for my MIG will only be coming in January next year~ so the final products will have stronger bond~ 
finally give my prototype V0.9 a bright RED coat to make it stand out from the dirty old axle~ :P lol~ 
Will do a test report later when i fix mango's axle, yet again~ 

stay tune~ chao~ 

Thursday, December 8, 2011


Finally my replacement axle shaft/half shaft and LSD arrived. Had to source another LSD for i wash't able to find a Kouki shaft so i had to compromise with Zenki one, Which on top is Kouki shaft with 25mm diameter and at the side is Zenki shaft with 24mm diameter.
Left to right, Kouki 2-way clutch type LSD, Zenki 2-way clutch type LSD, Zenki mechanical LSD (2-way as well) 
a close look~ the Zenki mechanical LSD uses 4 springs to pre-tension the clutches. 
Parts waiting to be clean-ed, oil-ed and install into mango. 

Monday, December 5, 2011

My AE86 Kouki Axle shaft snap-ed~

After the 'PIAK' sound, i still manage to reversed the car in front of my factory and after jacking up mango,  i check for any visible physical brokerage. 

With no visible damage, i then check mango's wheels. And to my 'horror' the left wheels is spinning 'happily' without any drags.
And this is what i saw after i took out the axle shaft.  
Comparison with the other side, clearly shows you that what had missing from the tip of it~ For the other end is stuck-ed in the LSD, i had to cut off a portion of the broken shaft in order to be able to tow mango to my friend's workshop.
 And call-up my uncle to tow mango~
Mango sure can catch someone's eyes~ ^_^~ 
After taking the LSD out and removed the debris. It's time to hunt for a replacement axle shaft. 

Friday, December 2, 2011

PIAK~!!! Oh no..... something broken-ed (>_<)~

Yesterday while testing out something to stabilize mango's engine and when i was fooling with the clutch (launching mango from stand still) A loud "PIAK" sound came from behind mango and then start giving out croke-croke noise~ 

At first i thought it was the new upper short torsion bar i made broke~ but after much inspection i found out that my left wheels was spinning freely O_o ~ oh no⋯⋯ 

And after taking apart my AE86 axle and this is what greet-ed me~ 

Monday, August 15, 2011

LSD- Fix?? or not.... (>_<)~

Finally i had time to took apart the LSD to see what's cause of the non-locking-up issue~
And as always~ there's a miss understanding where the non TRD type LSD on AE86 axle is 1.5 way~ 
But from Toyota website, there's only 2-way LSD and non-LSD type differential installed on AE86. And it was conformed by the two sloped side pressure plate.
And 3 tiny whinny clutch in it~ XD~ 
And i wanna test something on the LSD, as making some groove on it~ see if it will improved the 'clutch' power~ 
another view~
And 3mm spacer added to the spring to increase the pre-load on the clutches~
And where i found out that it might be the culprit which causes the problem. A shim which press on the pinion gear which press on the clutches system wasn't installed correctly...hm~ seems like someone had fiddle with this LSD before~ lol~ but with a little skim and hammer, it's back to it's good stage to installed back to the LSD~
Walla~ everything put back to it's own place~ hopefully can test it out on the next change i took apart mango's axle~ 
Will post the result by then~ stay tune ^^~~~ please bare with my bad narration~ hahaha~ 

Wednesday, August 10, 2011

T283 -AE86 Kouki Axle took-apart~

Selamat berpuasa  to all my muslim friends out there~ and with the month of fasting. Which means a small drop in business where i would have a bit of time working on my own stuff.
 As in the photo shown, i just took apart my spare AE86 axle. hoho~ 
 the drive shaft is 24mm shown that it's a AE86 Kouki.
 A shot before it was taking apart~ ^^
 And there's everything on the floor~ piece by piece~
 And the remain.......of oil~ XD
 A clear view of the LSD also show that it's Original AE86 2-way LSD
 Call-ed my bro to scoop out the oil manually~ XD~ wakakaka~ 
And finally the LSD was taken out from it's housing~ will took it apart tomorrow to see what's been faulty inside it to cause it not to lock at one side~